So you're interested in becoming a Scout? Excellent choice!
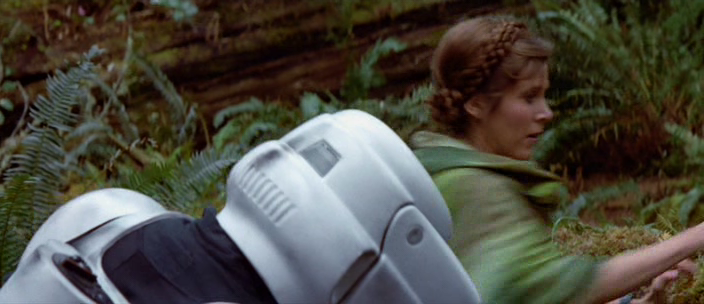
Scout Troopers are the ones who ride speeder bikes in Return of the Jedi and sometimes crash into trees, get pummeled by Ewoks or get their rides stolen. I'm sorry if this pictures a sad portrait. Personally, I respect Ewoks as fuzzy living things and they were fine with us until the Rebels showed up... Anyway, it's all in the past now. Let's get back to you and why you're reading this blog.
I will show you how to get started with your uniform. It's fun to put together and requires a fair amount of work if you know what you're doing. If you're not the handy type, you can ask for a friend (or your mother) to help with sewing, sanding, riveting, gluing...
Completion time can take up to two months with ideal shipping and work conditions.
Allow yourself at least 800 USD in your budget for a "basic" look, but it can go up to 1200 USD if you want to meet high accuracy standards.
Make sure you're a fully grown adult before you begin working on your suit: it's an investment, so you'll want to keep using it for many years to come.
Pathfinders/Lancers:
These are the official detachment ranks for all Biker Scouts in the 501st Legion. All Scouts who meet 501st standards can apply to the Pathfinder status. The people who have super accurate costume works and who participate in the community effort of the detachment (www.bikerscouts.net) are called Lancers. You can learn more about this in the aforementioned website.
You'll want to check many reference photos and images before you get working on your uniform. Some mistakes can't be undone and repairing/modding may cost you more than just getting what looks better for you.
Saturday, April 16, 2011
The Helmet
Like the armor kit, there are different makes and makers for the helmet. As with all armored costumes, this is the most important piece of your suit and you want it to have quality and durability. I bought a KS helmet, made of ABS, fully built, and for a price... but it was worth it.
 I replaced the snout/aerator detail piece with a more accurate one, found one eBay.
 The KS snout detail.
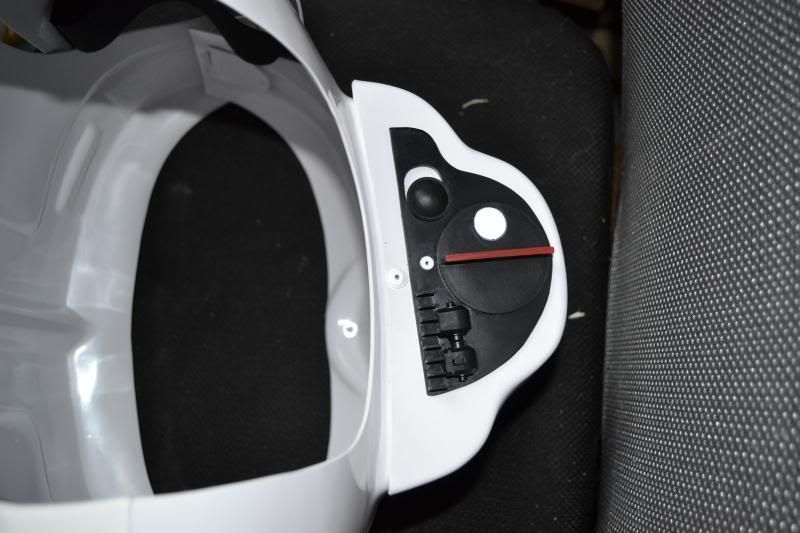
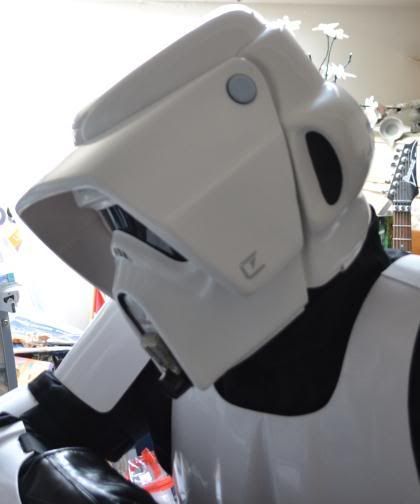 On the left side of the helmet there is the screen-accurate scout symbol. The bolt covers on each side are not screen-accurate, though. They should be completely flat and not have that black ring.
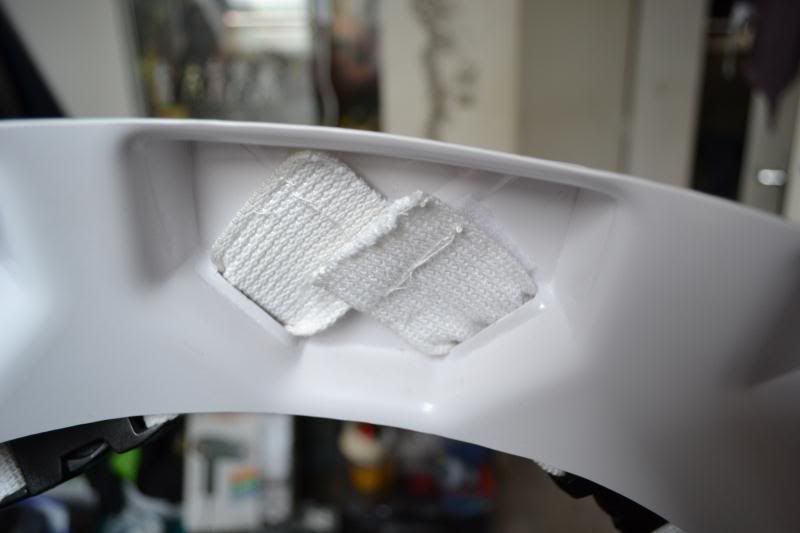
 The insides of the built KS helmet come with foam padding. Since it's rather large compared to other versions, I added a few more pieces (the blue ones) with double-sided tape.
I plan on adding a voice changer/amp system to my suit and having the extra room in there is great. Stay tuned for updates on that.
Update: the TrikToys microphone and amp systems integrated inside the bucket. It required 2 AA bateries, no static burst function.
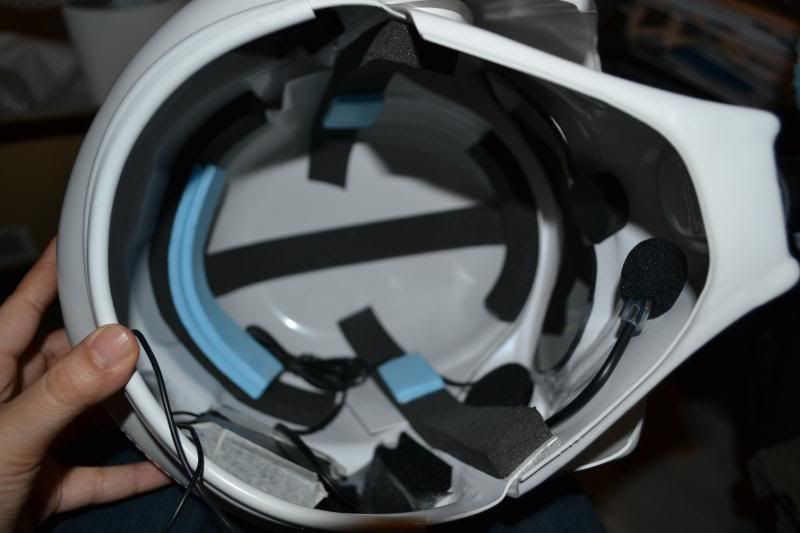


I plan on adding a voice changer/amp system to my suit and having the extra room in there is great. Stay tuned for updates on that.
Update: the TrikToys microphone and amp systems integrated inside the bucket. It required 2 AA bateries, no static burst function.
One wire comes out of it to connect to the speaker placed in one of my pouches.
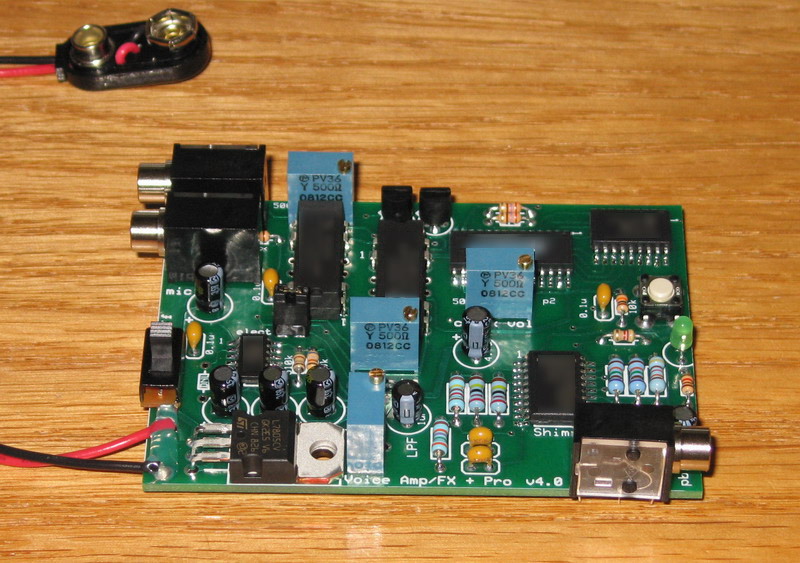
My newest mod is the Hyperdyne Labs system: the amp module (voice effects, random types of static burst, push-to-talk button), better quality microphone, only one battery needed.
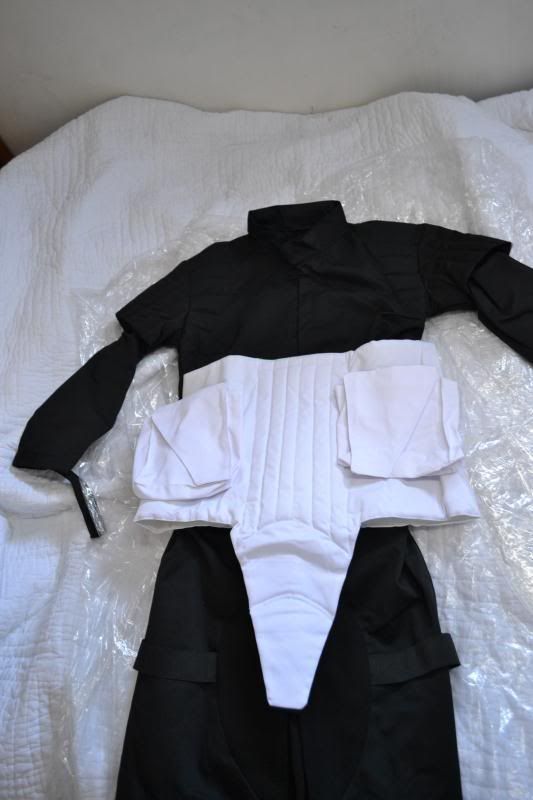
Soft Parts
The hardest aspect of the Scout, despite appearances, lies with the elements you don't see: the undersuit or "flightsuit", the cummerbund or "diaper" and the pouches. You can commission these pieces from excellent tailors who are also fans and cosplayers. Look around Bikerscout.net to find out who.
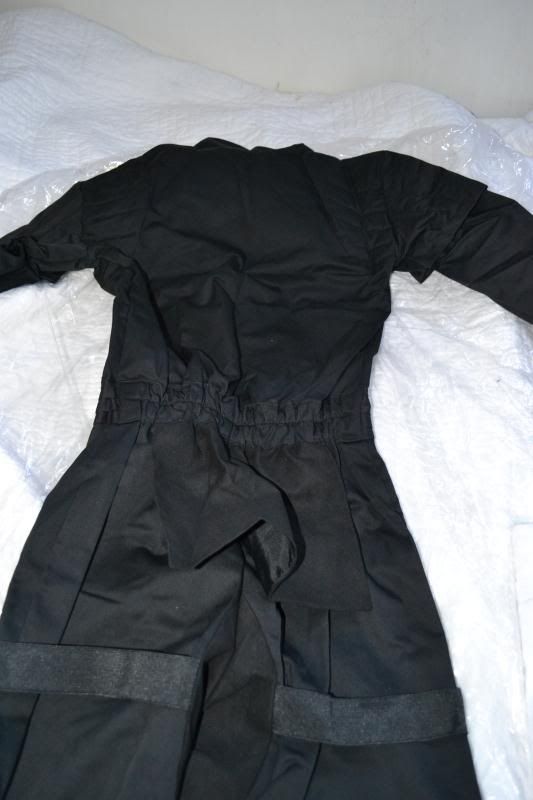
The flightsuit is basically black coveralls with no pouches, no zippers (aside from the middle zipper to put it on) and no buttons. The collar section closes up with a short velcro strap.

* Here comes the weird parts: the inner leg area or "saddle" is made of black suede. It has two black elastic strapping going around outside each thigh.
* Over the shoulders there is a short-sleeved vest with ribbing. You can make your own vest to wear over your flightsuit, which is not recommended if you live in a warm and humid climate, but doing so will make your costume super screen accurate for Lancer status. Detachment leaders will look at this for approval:
* There is a black suede "back flap" which hides the butt area. You can see it here:

The cummerbund is a separate piece that you wear over your flightsuit. It's made of white or off-white cotton with a "codpiece" and two pouches. You need 7 sewed lines in the middle, not ribs, and it needs to be filled in otherwise it'll have too many wrinkles.
 Fill the pouches with foam and make them look as good as you can. Not too fat and not too thin. I adjusted the width of the bund and reduced the length of the groin piece so that it wouldn't stick out so much.
And of course, don't forget your balaclava.
 Your chin/neck should not show when you're there trooping, or doing whatever. Make sure you're wearing something made of polyesther or spandex in order to keep you fresh within the confines of your helmet. I'm wearing a "under armour" type of balaclava which opens up to leave my face free if I want a sip of water.
The flightsuit is basically black coveralls with no pouches, no zippers (aside from the middle zipper to put it on) and no buttons. The collar section closes up with a short velcro strap.
* Here comes the weird parts: the inner leg area or "saddle" is made of black suede. It has two black elastic strapping going around outside each thigh.
* Over the shoulders there is a short-sleeved vest with ribbing. You can make your own vest to wear over your flightsuit, which is not recommended if you live in a warm and humid climate, but doing so will make your costume super screen accurate for Lancer status. Detachment leaders will look at this for approval:
* There is a black suede "back flap" which hides the butt area. You can see it here:
The cummerbund is a separate piece that you wear over your flightsuit. It's made of white or off-white cotton with a "codpiece" and two pouches. You need 7 sewed lines in the middle, not ribs, and it needs to be filled in otherwise it'll have too many wrinkles.
And of course, don't forget your balaclava.
Arms & Knees
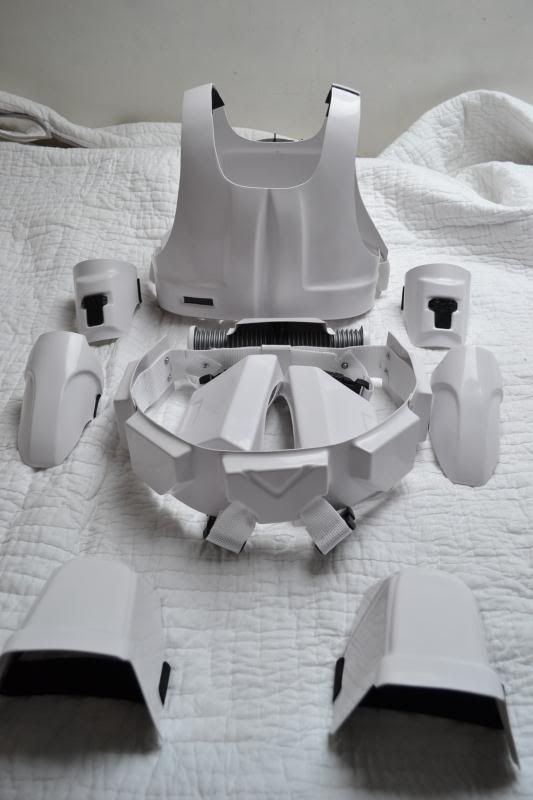
The Scout Trooper armor kit comes with 6 pieces of arm plates, and 2 knee pads. Their fixations and assembly are pretty straight forward: black/white velcro and black elastic strapping.
 You will need to do a bit of heat-shaping on them, and trim/sand certain parts if you're on the small side.
 This is the upper-arm piece, comes with a "T-bit" accessory that needs to be glued on, or fixed with a metallic wire through the ABS plate. I did not do that because I'm not confident enough with my drill. You may need to do some sanding on the T-bit, and heat up the plate a little before you place it in. That's a little risky but it worked out fine on this.
 Shoulder bells, heat-shaped to narrow them around and trimmed a bit on the lower part. Before and after.
Chest plates
Most kits will provide you with a two-piece chest armor: back and front plates, which attach together by the shoulder straps and the underarm sides.
Heat-shape them to fit around your ribcage. You don't want your armor to look like it wasn't made for you.

Assembly requires velcro and elastic webbing. Adjust the elastic length to your chest depth, keep in mind that you'll be wearing clothing (flightsuit, cummerbund) underneath. Also leave some room for moving around but not too much.
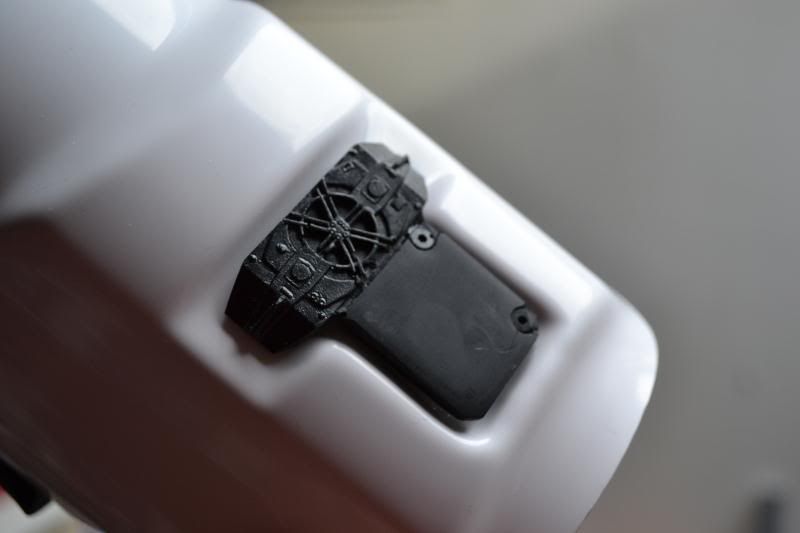
 The back pack of "tank" is assembled with a rivet in the SC kit. But for maximum accuracy you should glue it on to the back plate as there is no rivet on the ABS in the screen costumes.
 This is how the tank topper should be painted. You can use decorative decals from auto parts shops for a better result. You can see here that I also painted the rivet in white.
 More velcro work to connect the shoulder plates or "bells" to the shoulder straps. The black velcro combo is called a "T-strap". I used a curbed needle to sew the white elastic part to the first piece of velcro, and then sewed the second part of velcro to the white elastic.
They rectangle on the lower left corner is acceptable in black, or gray/off-gray for Lancer status. I used a simple piece of gray duct tape.
Heat-shape them to fit around your ribcage. You don't want your armor to look like it wasn't made for you.
Assembly requires velcro and elastic webbing. Adjust the elastic length to your chest depth, keep in mind that you'll be wearing clothing (flightsuit, cummerbund) underneath. Also leave some room for moving around but not too much.
They rectangle on the lower left corner is acceptable in black, or gray/off-gray for Lancer status. I used a simple piece of gray duct tape.
Blaster
The Scout Trooper only has one weapon, according to the movies: the holdout blaster pistol that he/she carries in their boot holster.
You can find replicas or makes of this blaster from different sources. Mine is a KS. It's made of wood and strong rubber. I added a coat of mat varnish to avoid any unwanted stains due to its paint.
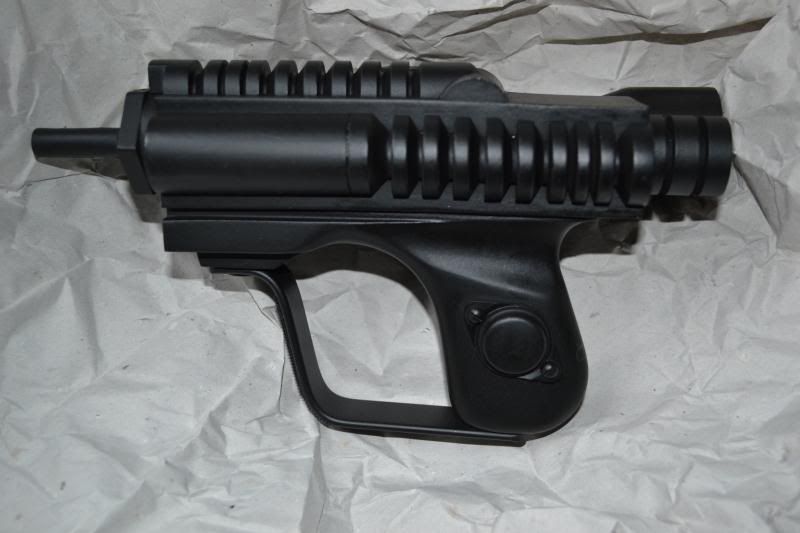


You can find replicas or makes of this blaster from different sources. Mine is a KS. It's made of wood and strong rubber. I added a coat of mat varnish to avoid any unwanted stains due to its paint.
It looks like it can be handled with either hand but I found that being left-handed just for this weapon makes more sense. See how the scope is placed strategically on the right?
Other versions:
Polymer Armory:
The trigger is not screen-accurate.
Kenner:
Resin cast of the Kenner toy, which is a copy of the movie stunt weapons but will not fit into your holster.
Sunday, April 10, 2011
Belt
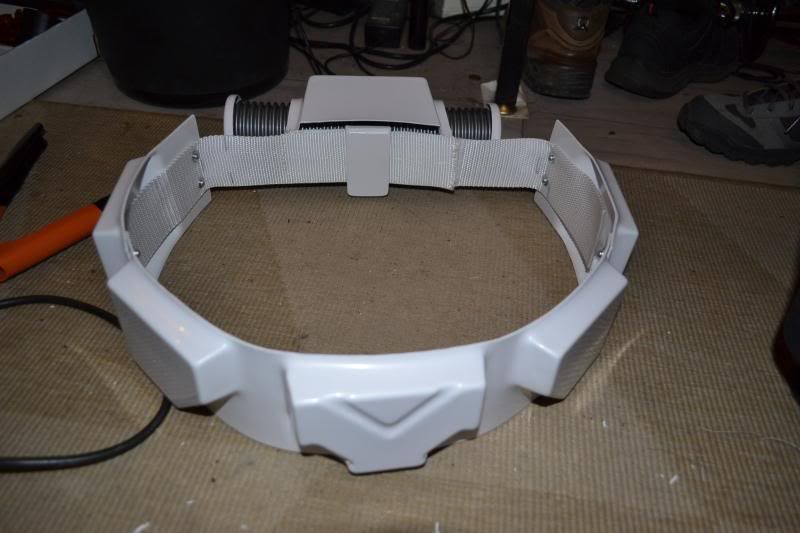
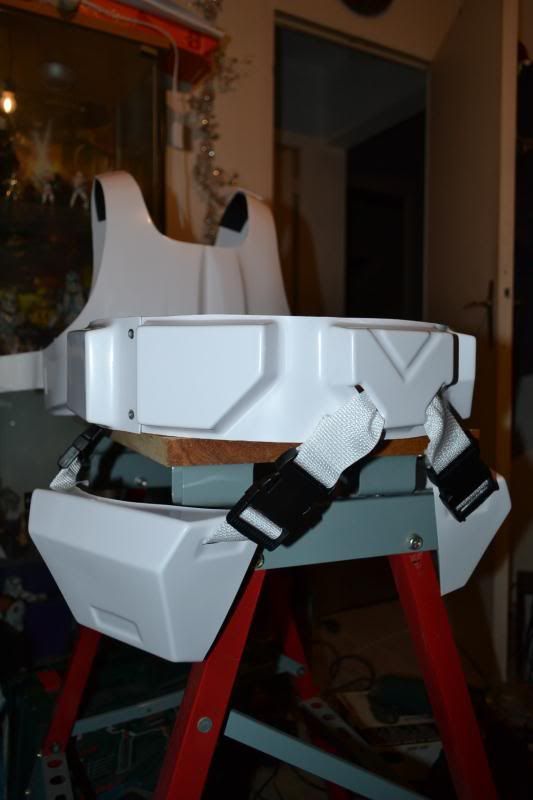
It's one of the more complex parts of the uniform because it comes as 3 elements: the belt itself, the thigh boxes, the thermal detonator. I suggest you take your time while making it and make sure it fits your hip line and not your waist (if you're female this is important).
You will need a drilling tool (DREMEL or power drill), rivets, rivet gun, rivet washers, sewing needle, thread, etc. Heat-shaping is not necessary but can help if you're really small.
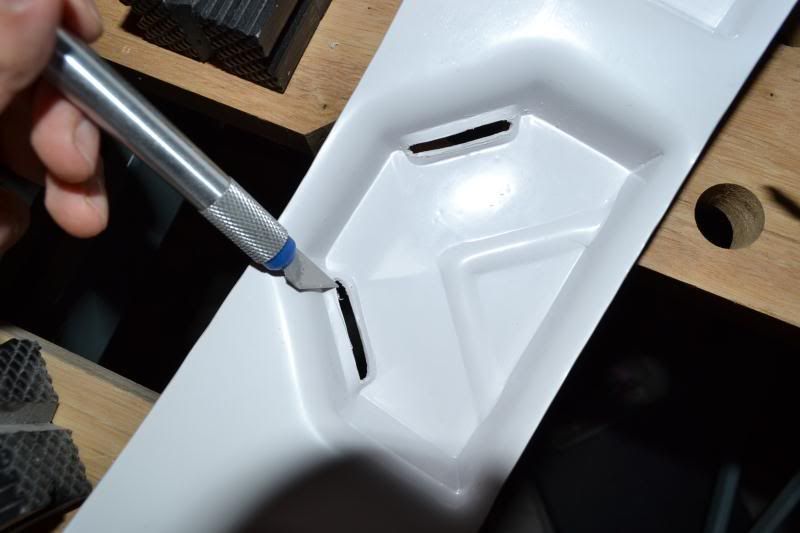 Cutting holes for the thigh box webbing. That's the X-acto knife. I helped myself with my power drill to make a first dent into it. ABS is hard to cut through when it's in an edge or curb. Mind your fingers.
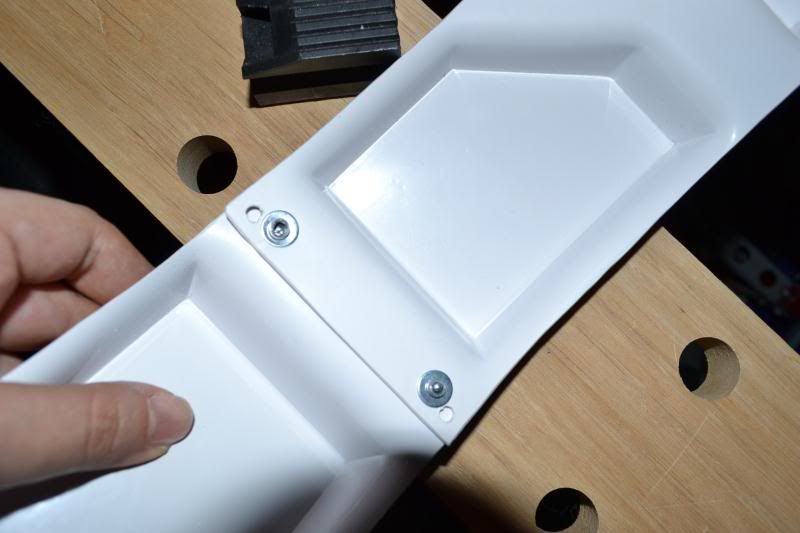 The belt is in one piece in the movie but SC makes it in 3 pieces so we have to stick them together... Some people use glue to avoid using rivets but I would have none of that. Rivets all the way because I suspect a lack of brain cells in the practicality department. Make sure you secure the rivet heads/nibs with foam or cloth to protect your suit.
 The thermal detonator, assembled as instructed using glue and zip ties.
 It's not completed with it's black greeblies (3 squares and a circle) because I accidentally damaged it with my heatgun, trying to widen the middle strip. Again, brain cell failure. Don't try to heat-shape this piece.
Update: after contacting SC they kindly sent me a new piece of ABS casing, so I eventually was able to redo this part.

 Two elements done, now for the thigh boxes.
 SC provides you with synthetic white webbing but for screen accuracy (and the Lancer status) you need cotton webbing. It can be white or off-white.
 I used the synthetic webbing but replaced it with cotton a week later. I just grabbed an old kimono belt from my Jujitsu days, washed it and got this nice piece of Lancer-material webbing. Recycling is your friend. We scouts love nature, remember that.
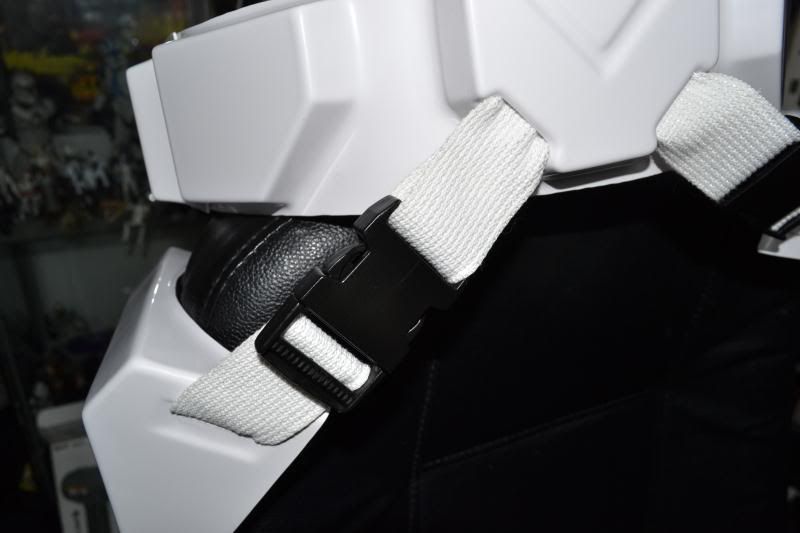
 To secure your thigh box straps you may want to make something like this, it's velcro, or have pins inside your boxes to adjust the length of your straps. They need to sit rather high on your thighs but I like them just a little lower for comfort.
You will need a drilling tool (DREMEL or power drill), rivets, rivet gun, rivet washers, sewing needle, thread, etc. Heat-shaping is not necessary but can help if you're really small.
Update: after contacting SC they kindly sent me a new piece of ABS casing, so I eventually was able to redo this part.
Subscribe to:
Posts (Atom)